March 28th:
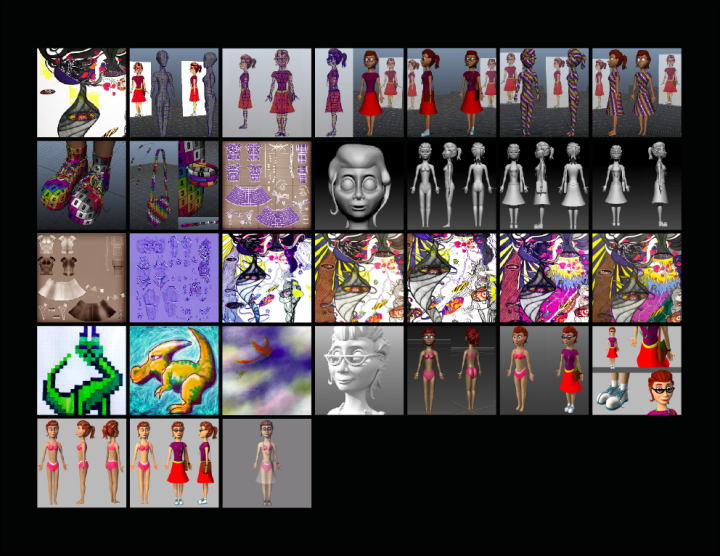
One more step down. Mudbox texture-painting: DONE.
March 27th:

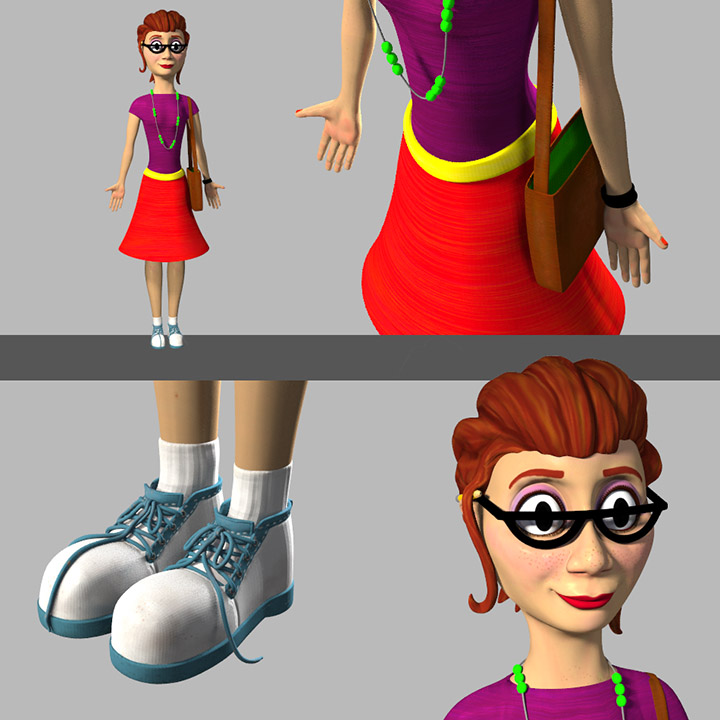
My girl's body color texture map is done and I painted preliminary colors on her clothing and accessories.
March 26th:
I started texture-painting in Mudbox today.
January 20th:

Today I texture painted my Warrior model in Mudbox. Then I added some grime in Photoshop and tweaked the images to make bump maps to accompany the color. There are far too many maps here for one character, but this is apparently how I laid out my UVs before I baked out my displacement and normal maps, so I'm just going with it because I really don't want to bake all of those maps again. I did, at least, resize the maps in proportion to one another.
I have begun the digital painted version of Mother Nature.
Day 45:

The first stage of the wind turbine on which Mother Nature is frolicking.
Day 44:
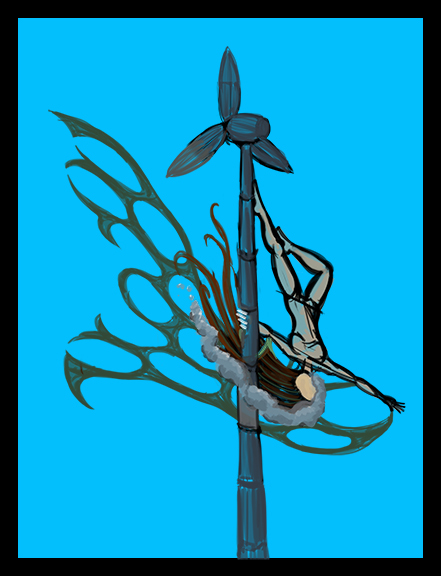
The sketch depicting the general layout of the digital image.
A Little More Artwork That I Did Today:
I started painting textures for my Gecko model in Mudbox.
Then I cleaned up the textures a bit in Photoshop:
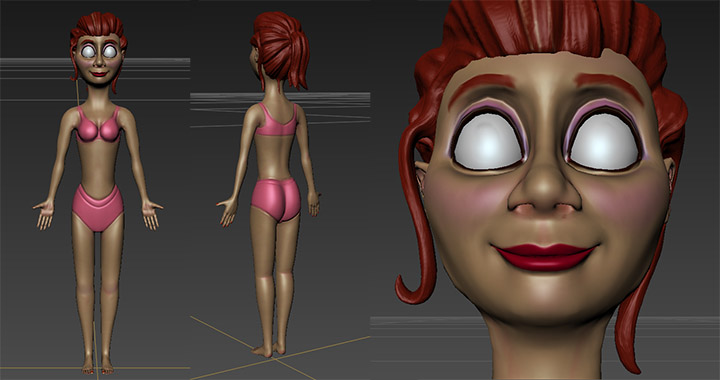
At the start of my fourth week of directed study I was concerned that my character's body had lost much of the volume that I had sculpted into the high resolution mesh. I had particularly noticed it in the shapes going down the character's back: according to my character design, you're supposed to be able to see those shapes puff out from the back a bit, but the back was nearly a flat curve. I had checked to be sure that the second subdivision level mesh that I exported from ZBrush retained volume in the shoulder area and detail in the face and fingertips, but I hadn't ever had an issue with a character's back, so I didn't think to check it. It was, however, a problem that was bugging me greatly - and one that I couldn't figure out how to fix without having to bake out all new normal maps and re-do all of the texture painting I'd done.
The problem was: I had changed the Uvs after choosing the second subdivision level of the ZBrush model to export as my low-res mesh to apply the normal map (created from the high-res mesh) to; therefore, I couldn't just export a higher resolution model that would hold the sculpted volume better and apply the same texture maps that I had created to it because the UVs wouldn't match up.
Then I had an epiphany: I could project the high-res detail from the ZBrush sculpt onto a subdivided version of the current mesh that I was using that matched the texture maps. Then I would end up with a mesh that had all of the subdivision levels, detail, and volume of the ZBrush sculpt, but with the same UVs that I had been using to build my texture maps. I even discovered that my current normal map functioned just as well when applied to the higher-res mesh as it did whern applied to the low-res one; I didn't have to bake a new one!
Below is a comparison with some of the most visible differences between the lower-res mesh that I started out working with and the final mesh that I decided to use pointed out:
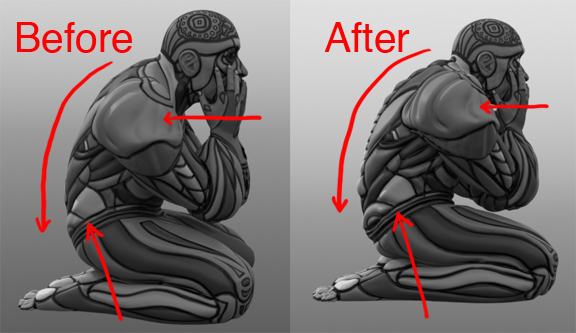
And the resultant character with the current texture maps that I had produced applied:
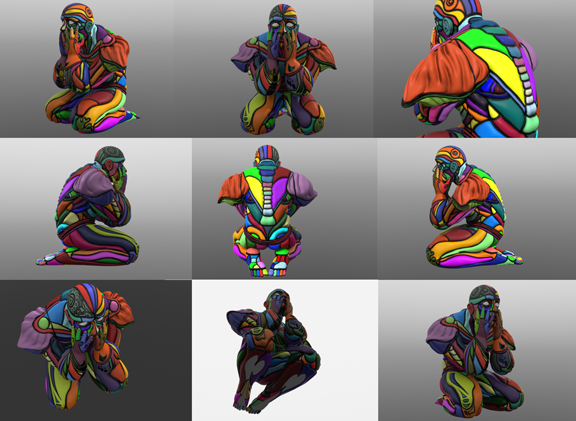
Then I really got down to texture painting, and found out that I had grossly underestimated how long it would take to doodle for this kind of work...

As I mentioned in my last post, I had spent a day painting the texture map that you see on the character above. I had nearly all of the precise linework done. I figured that would be the most time consuming part of the process. I know that one can spend a very long time doodling; I've spent hours filling up a single page with doodles in the past. Key word: "hours", not "days"... Turns out, days is what it takes to doodle textures on a character like this. In fact, it takes the better part of a week working straight through with breaks only for necessities like eating and sleeping. I was blown away. I know that I have a tendency of underestimating how long projects will take me, but this was ridiculous... I had reference. I knew that it took me a day for the precise stuff and that doodling isn't that precise and therefore should require less time. I knew how long I'd spent doodling on paper in the past... I didn't realize that doodling on the computer with my tablet would be as different as it was.
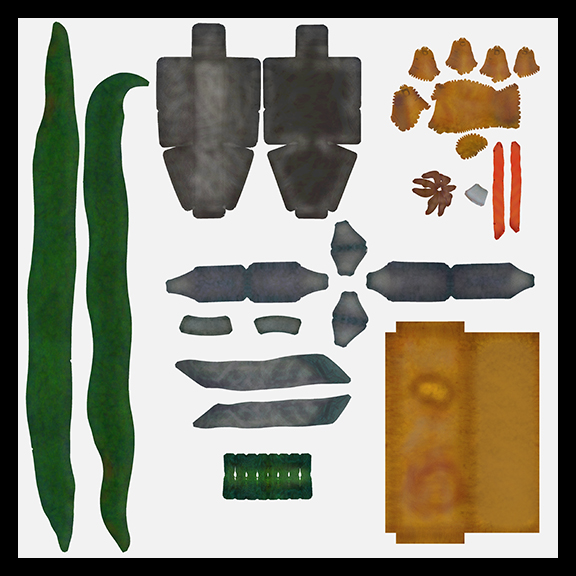
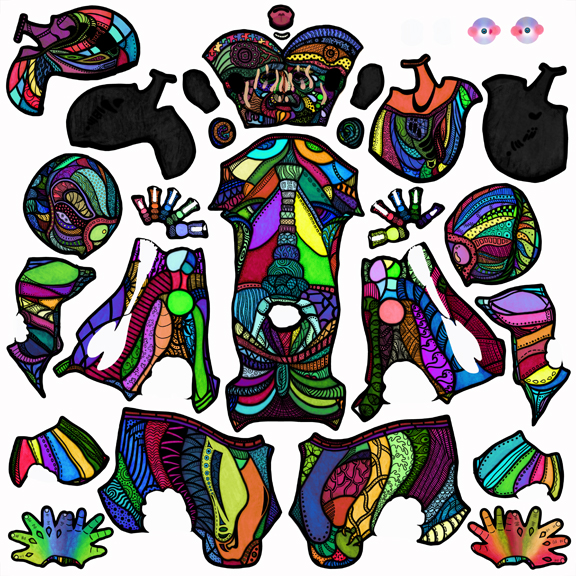
Anyway, here are the results of my week spent texture painting:
Addict Color Map:
Addict Bump Map:

Addict Specular Map:

Addict Material Layer Mask:
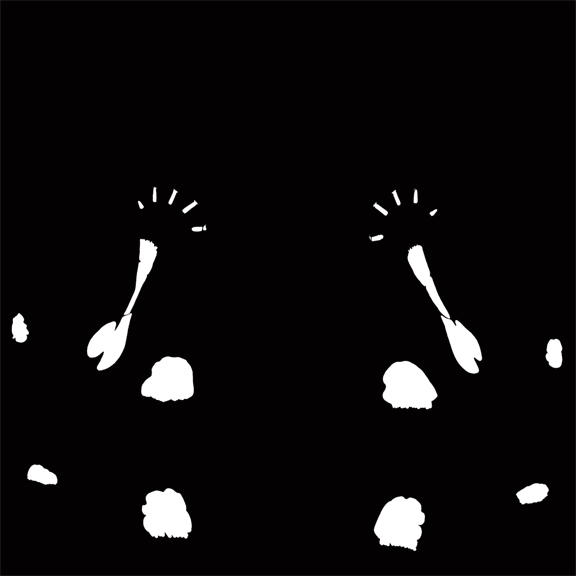
(The layer mask is to distiguish the portions of the model that have a raw plaster texture on them rather than a painted plaster surface, as the entire visible portion of the sculpture does.)
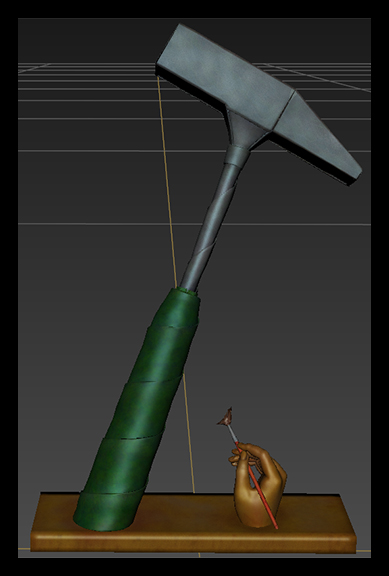
The Maps on the Model:
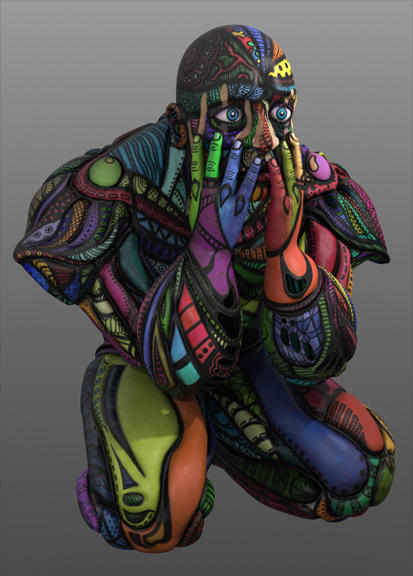
I'm very happy with the way he's turned out, but one of my favorite parts of him is one of the least visible:
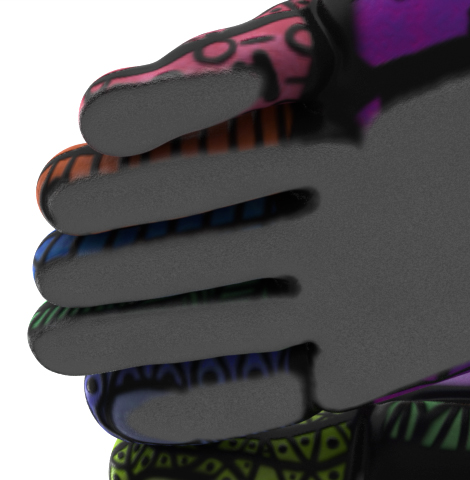
Now, you may be wondering why I'm so excited about the bottom of a foot (or, more accurately, since the character's on his knees, the top of a foot). What I'm most excited about, aside from the areas where the raw plaster sections transition into the painted portion of the model (which I think look very realistic, on the pink and orange toes especially), is that this is the first example of any work that I've done in Mudbox. That's right: I finally got around to trying it. I've been telling myself that I'll learn it eventually, whenever I finally work on a project that actually requires it, but I've produced surprisingly few textured models in my time at the Academy. I'm working on a "modeling" degree, not a "texturing" one, so I guess it makes a certain amount of sense, but, still, I'd have liked to have done more texturing in my time here. Anyway, back from my tangent: I had very visible UV seams showing up in this area where each toe meets the main body of the foot: the division line between the white plaster and black painted areas of each digit were uneven at those points. So, I took the model into Mudbox and painted out the seams. I'm very happy with the results. I know it's not an extravagant use of the program, but it's not bad for using a program for the first time with no training, if I do say so myself!
After I finished the texturing I set up turntable lighting, then decided that if he was going to be spinning he should have some kind of base to do it on, so I came up with this:
The Base:

Base Color Map:

Base Bump Map:

Base Specular Map:
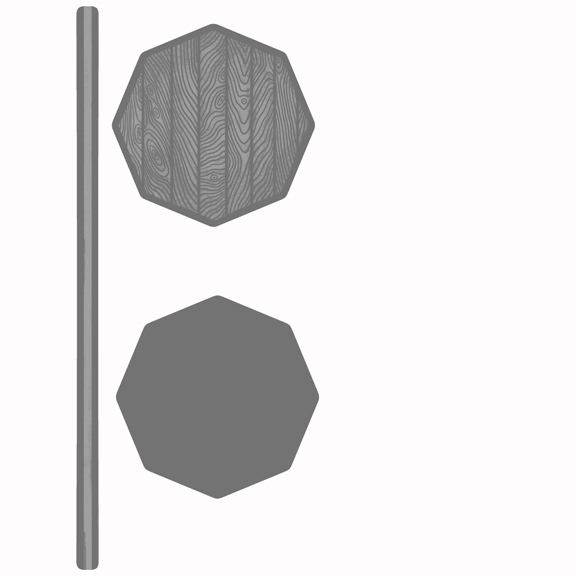
The base took a couple of extra hours to make and texture, but I think that it's worth it. It should give my character turntable just a little extra "oomph", as they say. I think that he looks better spinning on a base rather than floating in mid-air. I did one final test render before I began rendering the turntable a few days ago. (And, if you're wondering, yes, it's still rendering at the time that I'm posting this blog entry. I haven't had it rendering straight through, but, regardless, the amount of time that this turntable will have taken to render when it's done will be measured in days, not hours). This is the image that I got:

I have since fixed the faceting on the base by setting it to render at a higher subdivision level. In fact, the image of the base by itself above was my test of the higher subdivision render, and is what it will look like in the final turntable. Once that render finishes, I will move on to rendering the wirframe and flat-shaded versions of this model, then I'll start rendering my Juggler. In the meantime, I'm also going to work on my gallery models in the coming week; I'm really excited about building the fretwork ceiling and the crazy light fixtures. I'll be working during the day and rendering at night - here's hoping that after this month is over my computer and I will both get a break for a little while, because, until then, it's work, work, WORK!