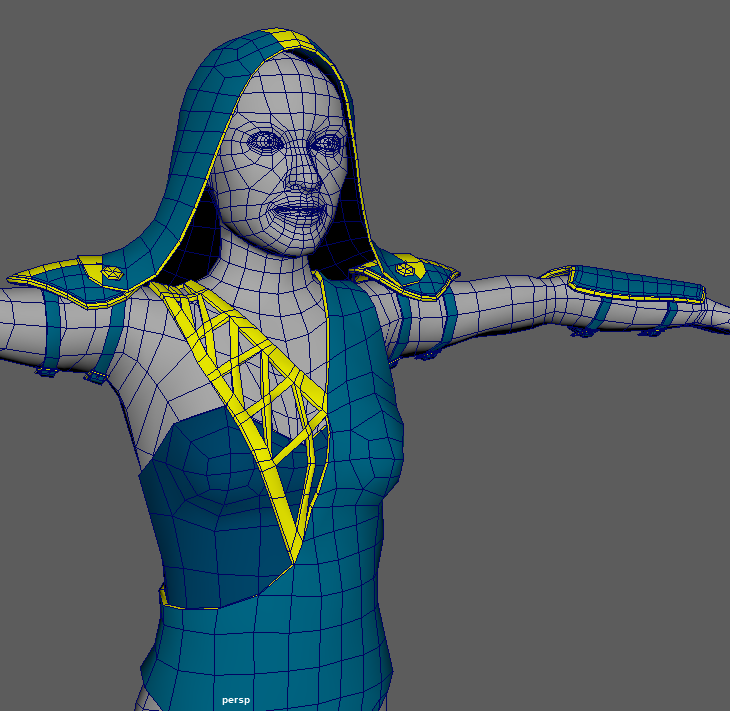
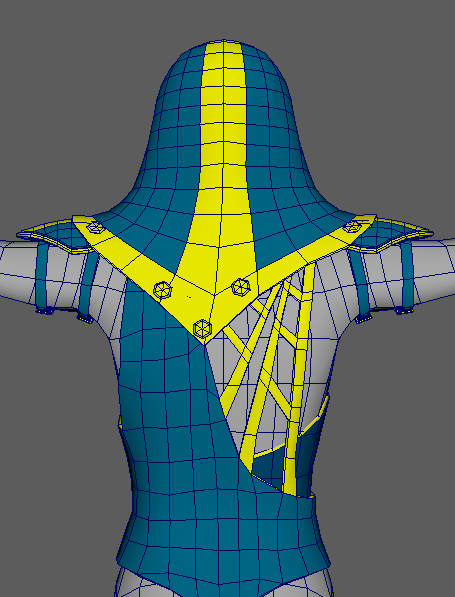
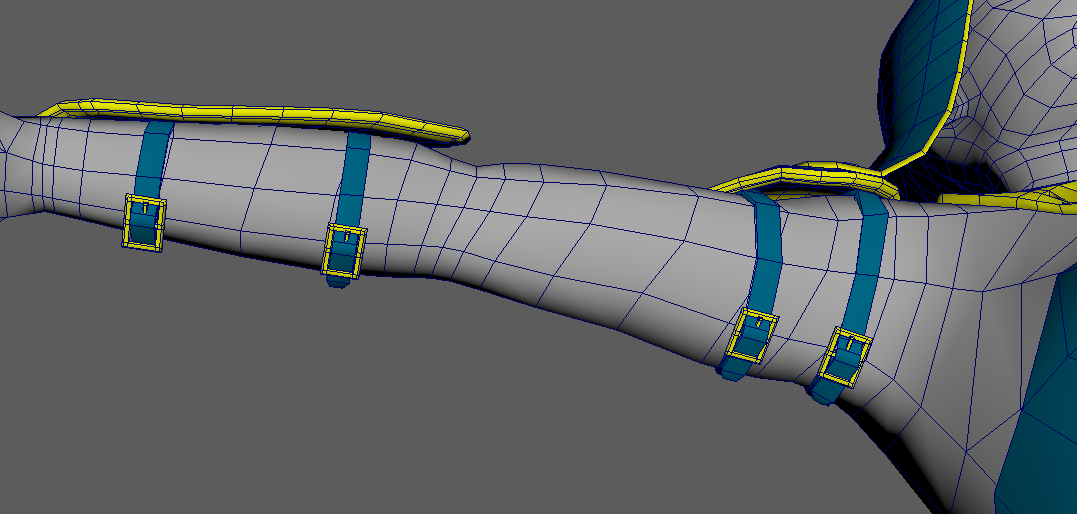
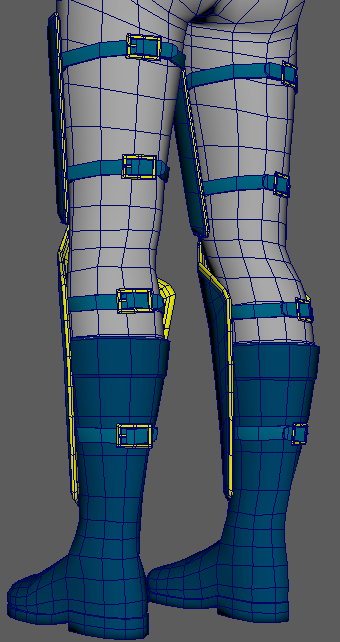
Here is a video turn around of the low poly 3D outfit that I’ve been working on. It is still untextured; the colors are simply temporary placeholders to give an idea of the final color scheme. There are also no normal maps applied to the mesh to indicate high poly details. Those improvements will be added soon.
Low Poly Skirt = Finished
I finished the low poly skirt:

It looks like it’s sitting a little funny up near the hips, but that’s just because the thigh armor is pushing it forward up front so that it doesn’t hug her figure quite as well as I would have liked. I can’t very well have the thigh armor mesh poking through the skirt fabric mesh though, so it is what it is - clothing doesn’t always sit pretty in real life either.
Some Low Poly Clothing
After basically putting this project on hold for months to focus on other projects still under NDA, I’m making time for my portfolio again. I created a high poly tube top and a skirt/pant combo in Marvelous Designer, but after working with the skirt/pant clothing pieces in Maya for a little while I decided I wasn’t happy with the clothing design and remade the skirt/pant combo into a skirt/skirt combo.
High poly Marvelous Designer clothing viewed in Maya.
Now I’m working on the low poly clothing. When I create low poly clothing for characters I nearly always use the character body as a starting point, duplicating the mesh and trimming or otherwise altering it to fit the area covered by the piece of clothing. This ensures that as the body and the clothing deform, the topology stretches and compresses in the same areas to prevent clipping as much as possible. The exception to this rule is loose articles of clothing such as capes or skirts.
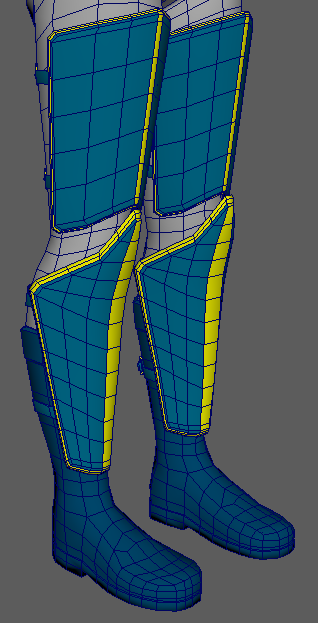
Armor is usually a different matter. It doesn’t need to match up because it deforms much less, if at all. I usually build a low poly base for armor in Maya, then send it to ZBrush to sculpt the high poly. I have created the low poly armor for the character already, but have yet to do the high poly sculpting.
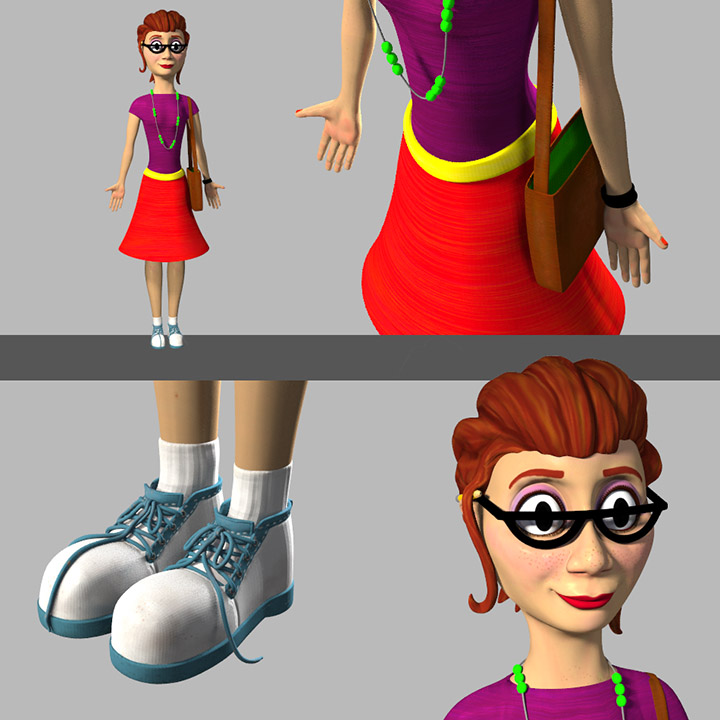
Here is what my low poly outfit looks like at the moment. (The skirts are not pictured because the low polys are not finished after the re-design.):
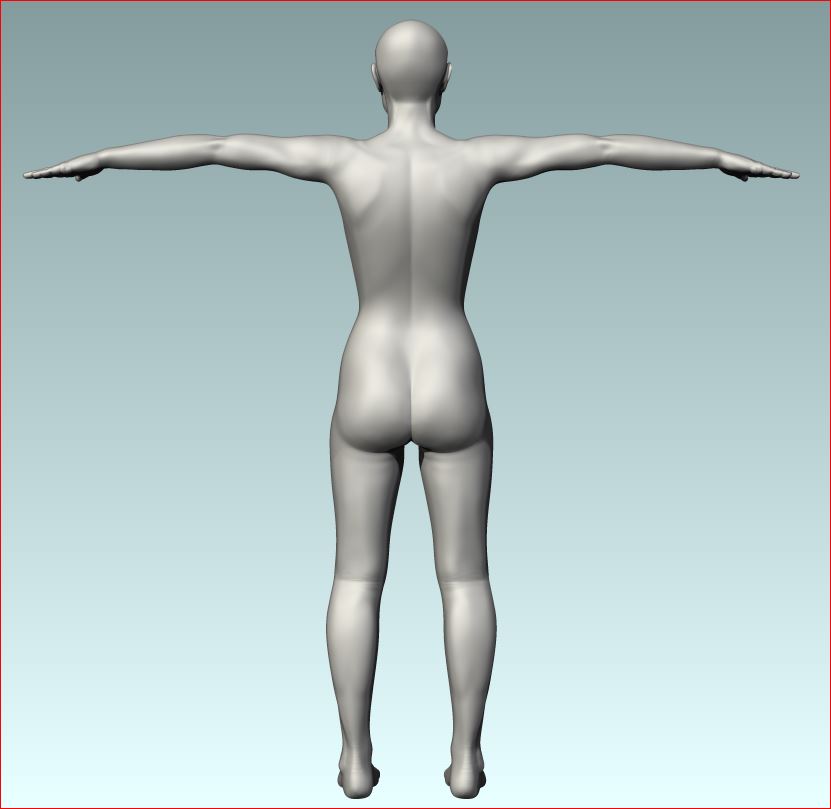
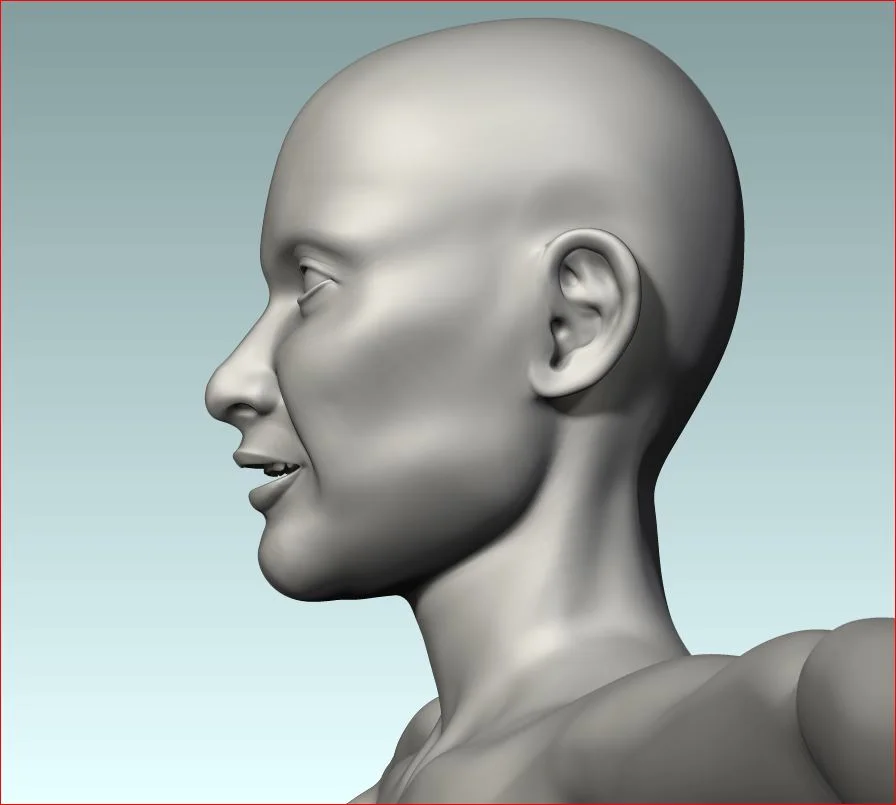
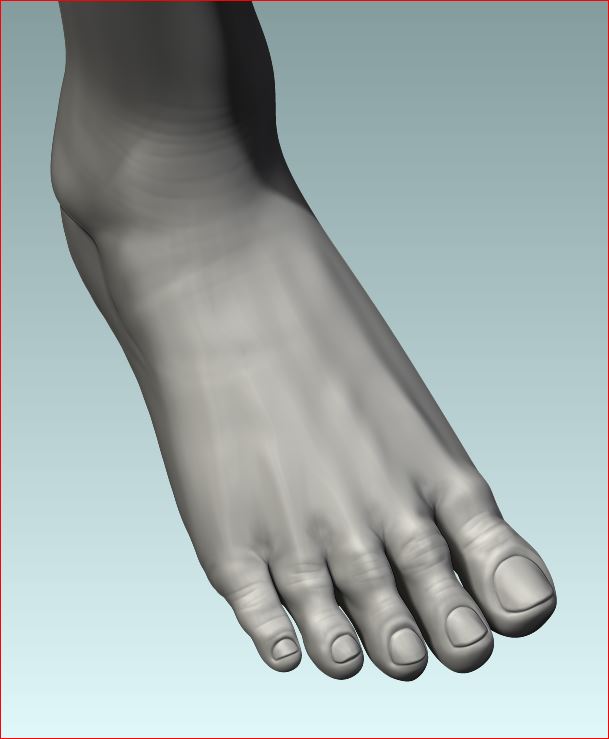
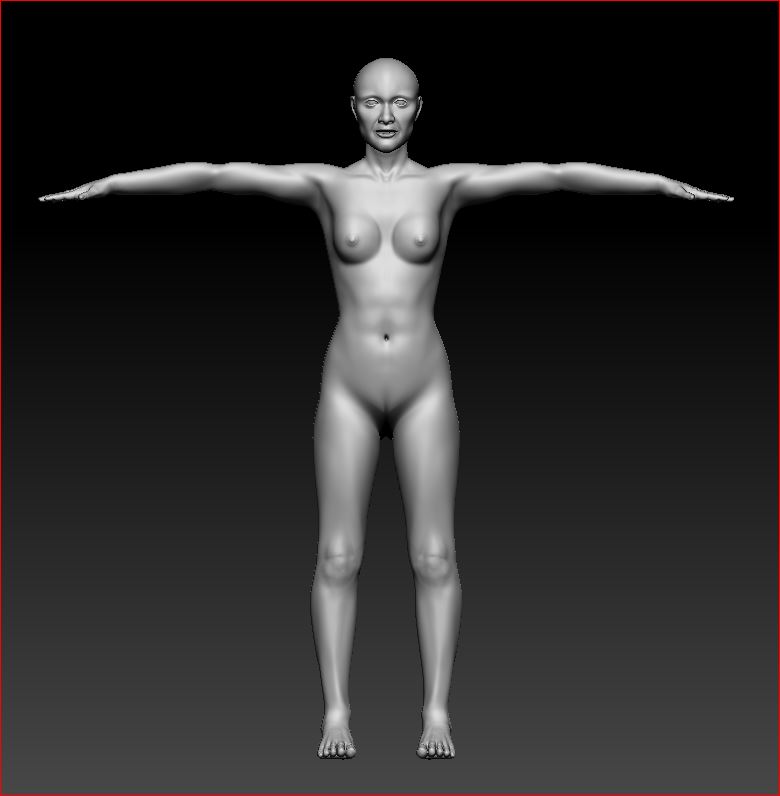
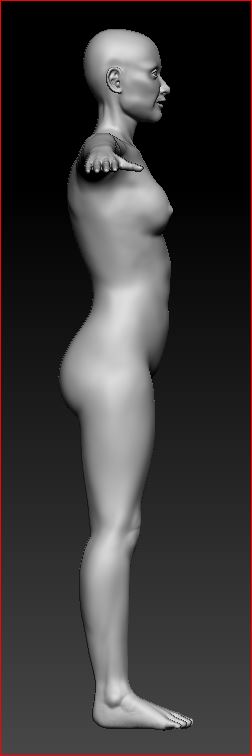
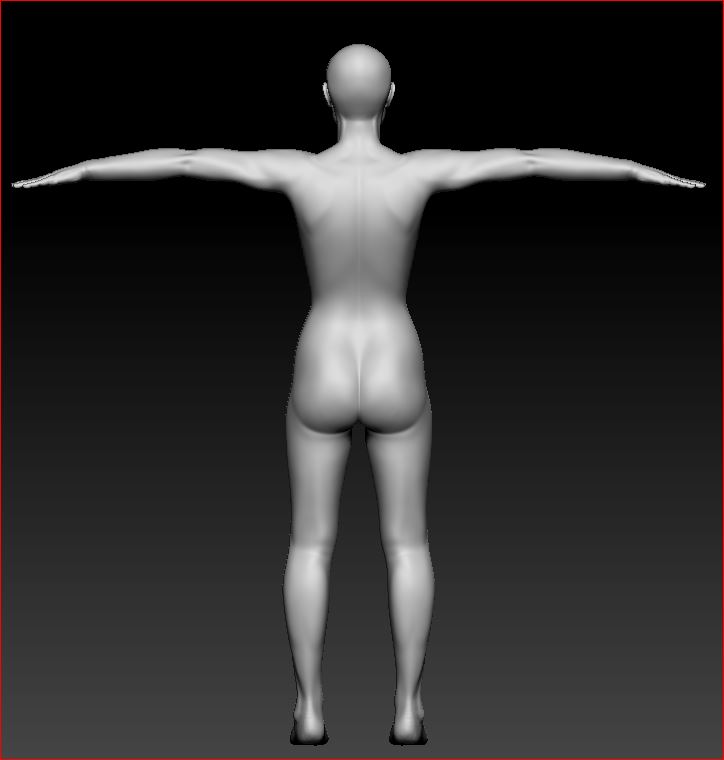
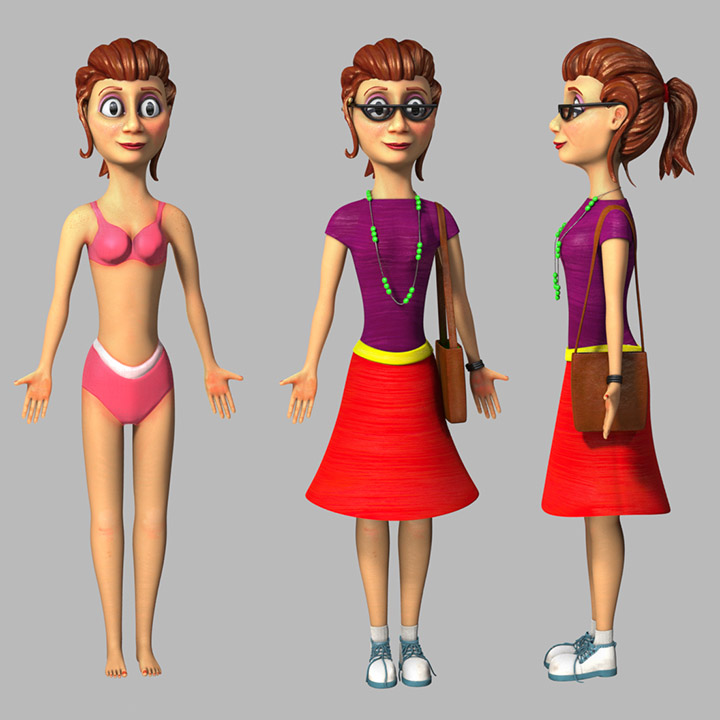
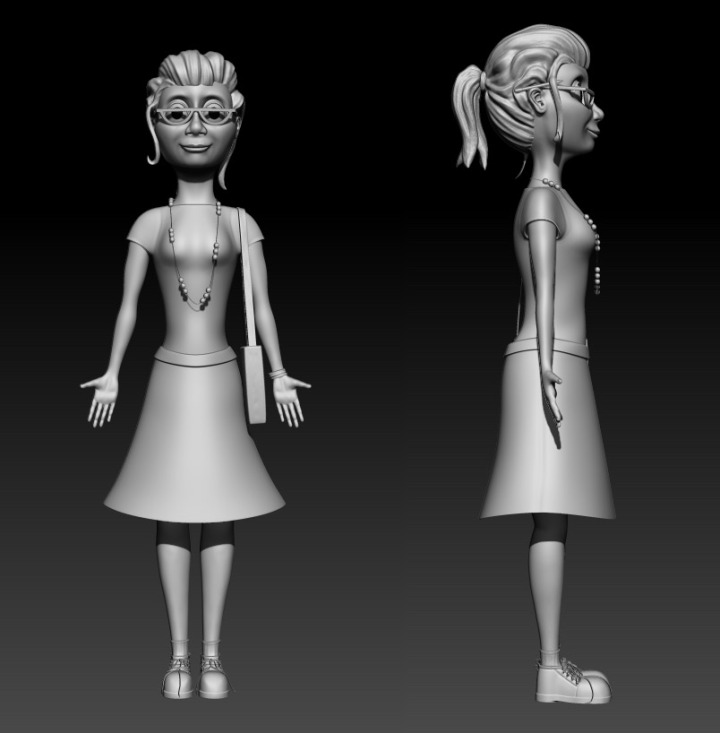
Low Poly Female Character
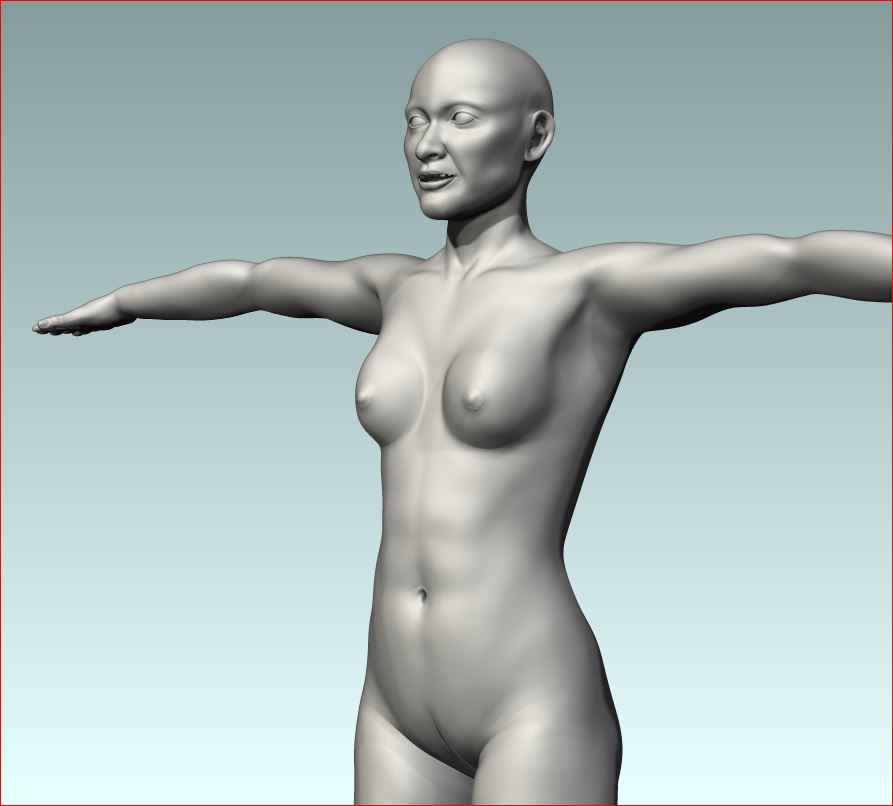
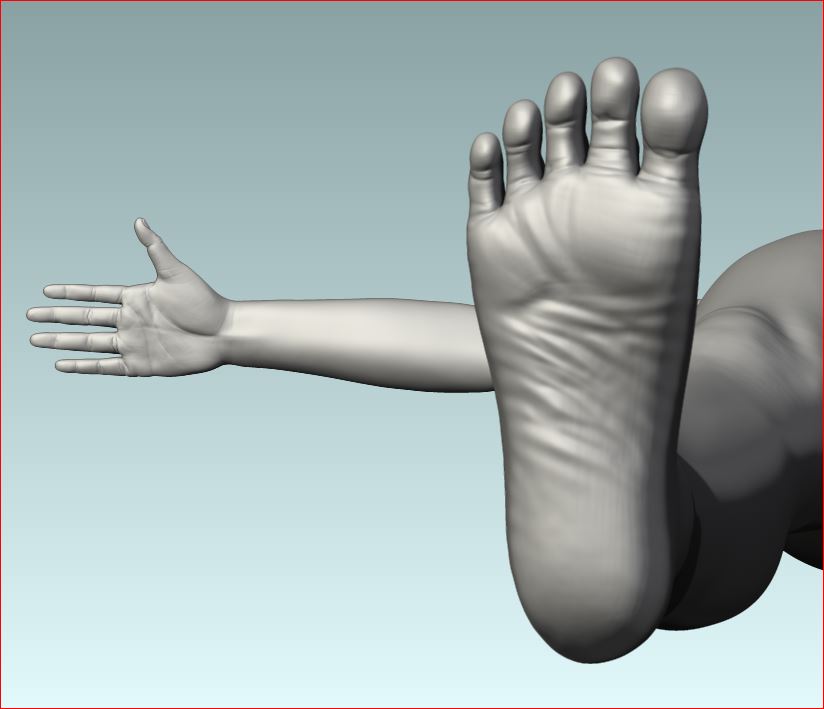
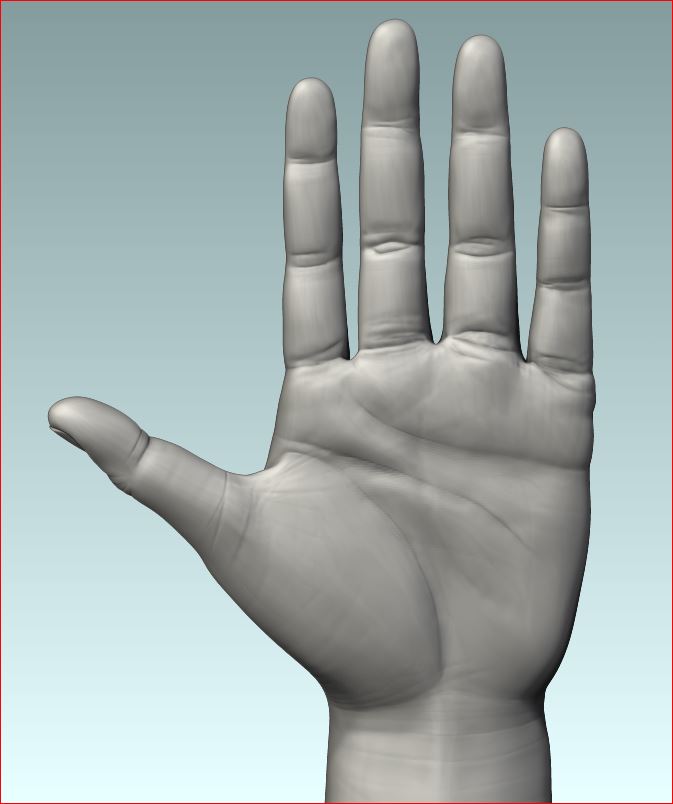
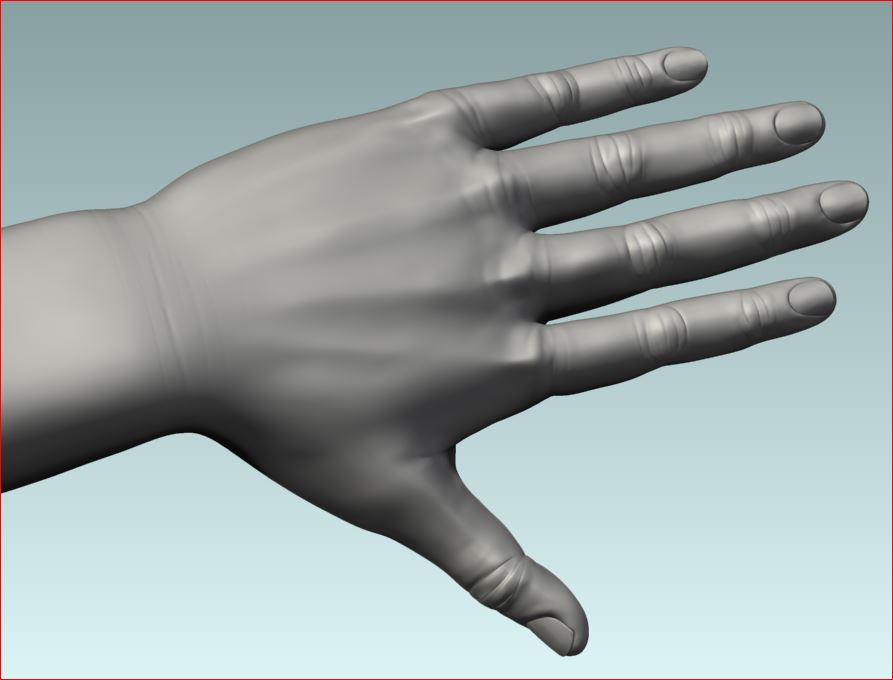
I’d like to share a few more images of my 3D female character model.
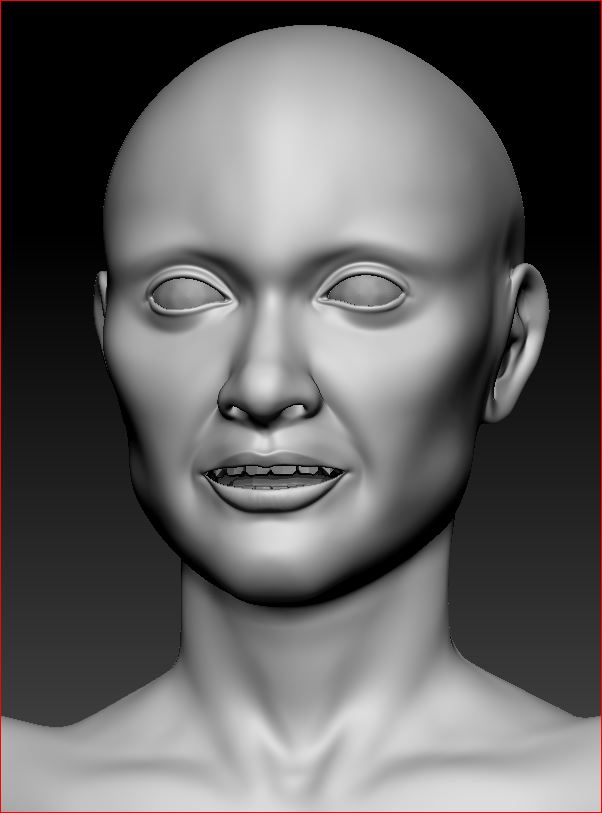
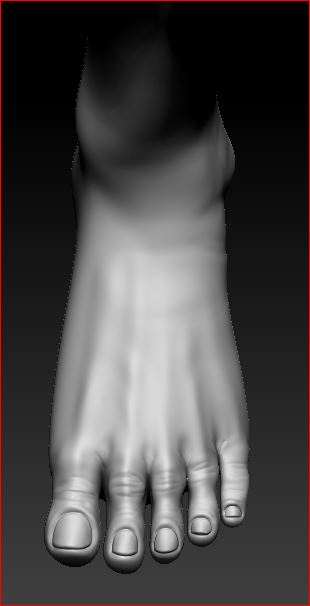
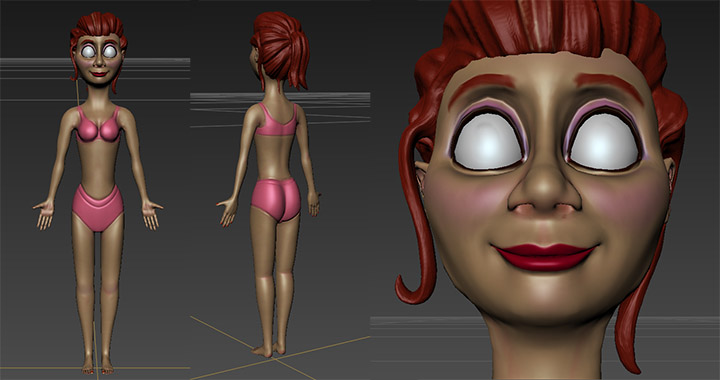
High poly sculpt for normal map completed in ZBrush.
The high poly sculpt was completed a couple of weeks ago and I’ve been working on completing her clothing for some time now.
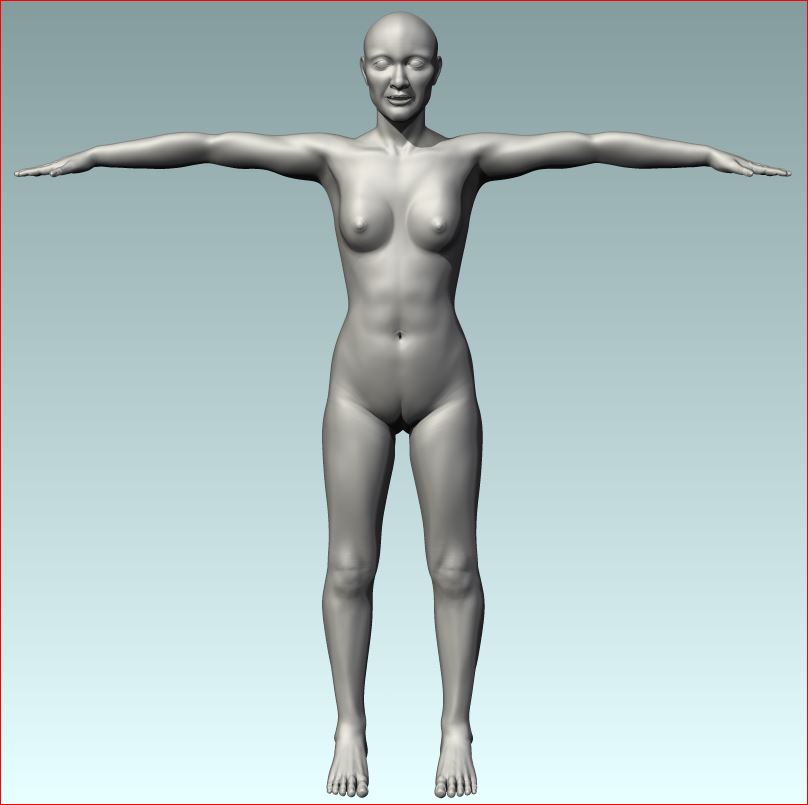
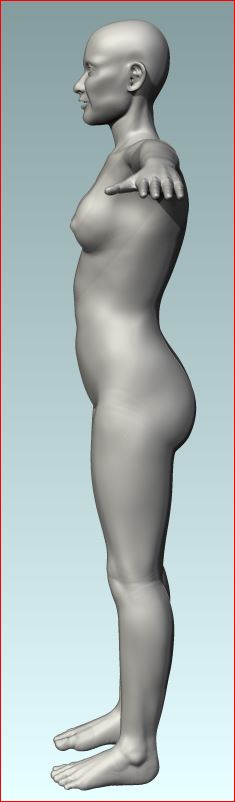
I’m very happy with the quality of the sculpt, which I have used to produce a normal map to apply to the final low poly mesh.
I look forward to finishing the clothing, hair, and texture with the same high quality work.
Props project
I paused my progress on the high poly sculpt of the female character model to make a couple of new entries in my portfolio using a model created during my time in grad school. For my MFA thesis project I created a sculptural character made of around 50 different props. I dubbed her “the Juggler”, as she’s inspired by all of the working parents out there juggling the responsibilities of work and home and family. I believed that the character would be a perfect way to show that I’m a well-rounded modeler that can sculpt both organic and hard surface models, but I think perhaps I made her too compact and hid too many of the props that I spent so much time modeling.
I’ve been told that my portfolio is lacking in props and hard surface items. I do definitely focus more on organic, and it’s true that my portfolio is somewhat lacking on low poly hard surface, but this character is made up of so many props that I think I just need to feature them more. To accomplish this I am making exploded views of each of the character’s limbs to clearly showcase the numerous props that make them up. I would love to make a bunch of textured, low poly props for my portfolio as well, but since I’ve had a request to show that I can make props and I don’t want to spend too much time away from my progress on the characters I’m working on at the moment, this will just have to do for now.
After many fun computer crashes eating up my work time today, here’s what I’ve got so far:

Juggler Right Leg - Kitchen Props - final render

Juggler Left Leg - Housework and Hobby Props - Work in Progress
I’m still working on getting the lighting right in this image because Modo is acting extremely unstable on my computer right now and crashing every time I go into render mode on this scene. I’m hoping that by hiding some of the more ridiculously high poly props (like the tea ball mesh) I will be able to get the render view working correctly tomorrow.
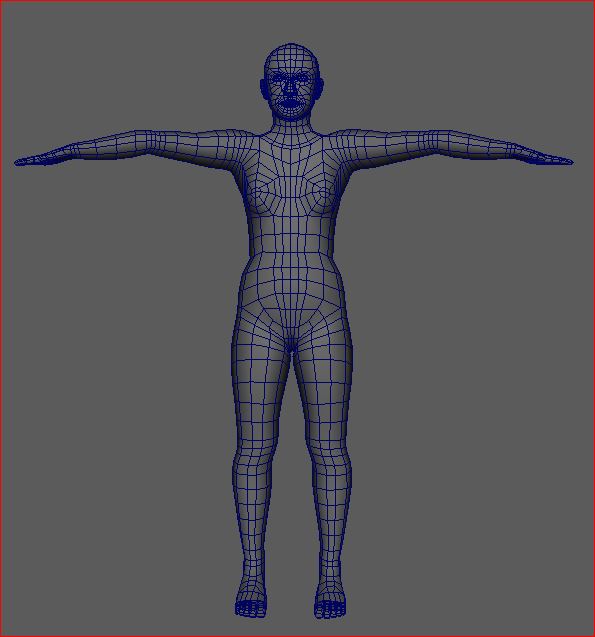
Turnaround of Low Poly model
After about a week of working intermittently on the high poly sculpt I’m still finishing up some fine details, but the shape of the low poly is finalized. I rendered a quick wireframe turn-around in Blender. Here is the result.

Wireframe turnaround of low poly female model
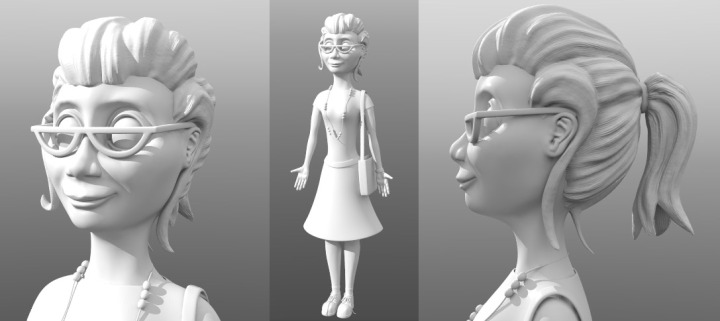
And here is some progress on the high poly model:
New Project
After 4 years of working 2 jobs and never having time to add to my portfolio, I’m finally down to only one job, so I’m using my time off to update my portfolio. Here’s my latest work in progress:
Low Poly Base Model created in Maya

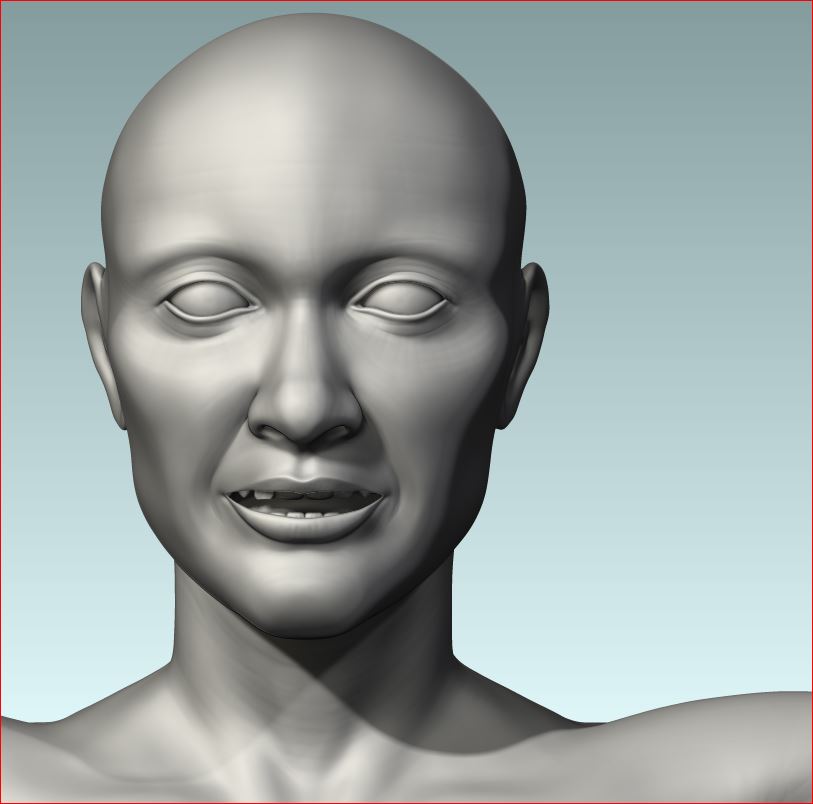
Close up of the face of the Low Poly Base Model created in Maya

Early progress on the High Poly Sculpt in ZBrush. The character’s mouth, particularly, needs more work, but it’s a start.
Daily Art: April
Daily Art: Beauty Shots
April 1st:

Today I set up and rendered a few beauty shots of my model. Then I realized that I should probably pose my model before getting too crazy with the beauty shots...
Daily Art: March
Daily Art: Video Editing
March 31st:
I spent some time today video editing my girl's turntables in After Effects for my demo reel.
Daily Art: Materials
March 30th:
I made the extra maps, masks, and materials needed for my girl's clothing and accessories. Then I fixed her skin material so that it appeared less rubbery. I'm quite pleased with the final outcome.
On to rendering!
Daily Art: Texture Maps and Materials
March 29th:

Today I spent a lot of time working in both Photoshop and Modo. I painted material masks and tweaked texture maps to create new maps (like specular amount maps) in Photoshop, then tested the effects of those maps in Modo while I refined the materials applied to my girl's body.
Daily Art: Texture-Painted Accessories
March 28th:
One more step down. Mudbox texture-painting: DONE.
Daily Art: More Texture Painting
March 27th:

My girl's body color texture map is done and I painted preliminary colors on her clothing and accessories.
Daily Art: Mudbox
March 26th:
I started texture-painting in Mudbox today.
Daily Art: Back to Modeling
March 25th:
Back home: back to modeling. Spent my art time today testing and fixing abnormalities in all of those normal and displacement maps that I baked before I left.
Daily Art: Normal Maps
March 16th:

I'd never baked normal maps out of ZBrush until this model: I've always baked them out of Maya because I heard that they came out so much better. I decided to try it this time because it seemed like it would save a lot of time. What I didn't account for was the learning curve of finding the right settings in ZBrush, so I ended up spending twice as long as I should have because I spent a long time fiddling with settings in ZBrush and actually ended up baking one set of maps from Maya in addition to those that I baked in ZBrush.
Daily Art: Maps
March 15th:

I baked displacement maps and normal maps out of ZBrush.
Daily Art: Finishing Touches
March 14th:
A bit of tweaking.